새로운 강의는 이제 https://memi.dev 에서 진행합니다.
memi가 Vue & Firebase로 직접 만든 새로운 사이트를 소개합니다.
모던웹(NEMV) 혼자 제작 하기 3기 - 88 게시물에 댓글 추가하기
게시물에 댓글을 추가해봅니다.
동작 방식
게시물의 댓글은 크게 두가지 방법으로 구현할 수 있습니다.
종속형
게시물이 댓글들을 통째로 가지게하는 것입니다.
게시물 모델에 댓글 필드만 추가하고 관리하면 끝입니다.
eg)
article = {
  _user: 글쓴이_id,
  content: '새로운 글',
  comments: [
    {
      _user: 사용자A_id,
      content: '어쩌구'
    },
    {
      _user: 사용자B_id,
      content: '저쩌구'
    }
  ]
}
게시물만 읽으면 종속 댓글을 다 읽어볼 수 있습니다.
관계형
댓글이 게시물의 아이디를 참조합니다.
댓글만 따로 관리가 가능하고 페이징과 검색이 가능합니다.
하지만 관리가 귀찮고 코딩양이 늘어납니다.
게시물을 읽을 때 댓글도 따로 읽어줘야합니다.
eg)
comments = [
  {
    _article: 자유게시물_id,
    _user: 사용자A_id,
    content: '어쩌구'
  },
  {
    _article: 다른게시물_id,
    _user: 사용자B_id,
    content: '저쩌구'
  }
]
선택의 기준
데이터베이스 설계를 할 때는 항상 데이터양을 고려해야 합니다.
댓글 1개에 100글자로 길이제한을 둔다면 대략 200바이트 정도 되는 것입니다.
100개 이하라면 꽉 채워봐야 20000바이트로 작은 이미지 사이즈도 안되기 때문에 종속형으로 간편하게 마무리 할 수 있습니다.
하지만 댓글이 20000개라면 매번 게시물을 GET 해올 때 댓글을 모두 읽어 오게 되는 낭비가 발생합니다.
20000개 분량의 데이터를 브라우져가 받어 두고 페이징을 해야하는데 서버도 클라이언트도 메모리 낭비가 커집니다.
그러니 많은 댓글은 관계형으로 설계해야 페이징이 가능하게 해야 합니다.
학습을 위해 본 강좌에서는 관계형으로 구현해보겠습니다.
모델링
be/models/comments.js
const mongoose = require('mongoose')

mongoose.set('useCreateIndex', true)
const commentSchema = new mongoose.Schema({
  content: { type: String, default: '' },
  cnt: {
    view: { type: Number, default: 0 },
    like: { type: Number, default: 0 }
  },
  ip: { type: String, default: '' },
  _user: { type: mongoose.Schema.Types.ObjectId, ref: 'User', index: true, default: null },
  _article: { type: mongoose.Schema.Types.ObjectId, ref: 'Article', index: true }
})

module.exports = mongoose.model('Comment', commentSchema)
기존 articles.js를 복사해서 만들어봤습니다.
어떤 게시물 소속 인지는 _article 에 담기로 했습니다.
백엔드
게시물 읽을 때 댓글과 같이 가져오기
게시물과 댓글을 같이 전송 이유는 없습니다.
게시물 받고 나서 댓글을 받는 것이 맞지만 간단하게 처리하기 위해 같이 보냅니다.
be/routes/api/article/index.js
const Comment = require('../../../models/comments')

router.get('/read/:_id', (req, res, next) => {
  const _id = req.params._id

  let atc = {}

  Article.findByIdAndUpdate(_id, { $inc: { 'cnt.view': 1 } }, { new: true }).lean()
    .select('content cnt')
    .then(r => {
      if (!r) throw new Error('잘못된 게시판입니다')
      atc = r
      atc._comments = []
      return Comment.find({ _article: atc._id }).populate({ path: '_user', select: 'id name'}).sort({ _id: 1 }).limit(5)
    })
    .then(rs => {
      if (rs) atc._comments = rs
      res.send({ success: true, d: atc, token: req.token })
    })
    .catch(e => {
      res.send({ success: false, msg: e.message })
    })
})
- 기존 게시물 읽기 api에서 댓글과 같이 전송하기 위해 atc라는 변수를 하나 두고 댓글을 보태서 전송합니다.
- 게시물을 가져올때 lean()을 썼는데 받은 값을 변경하기 위함입니다(몽구스 객체에서 오브젝트 변수형으로 변경). 없을 경우 atc.xxx = xx 같은 변경은 되지 않습니다.
- 댓글을 찾을 때 해당 게시물 아이디로 찾고 사용자 정보를 같이 보내주기 위해 파퓰레이트 시켰습니다.(사용자 정보 중 패스워드 같은 것은 넣으면 안되니 id와 name만 선택하도록 했습니다.)
- _id로 소트한다는 것은 발생 일시로 정렬한다는 것이죠.
- limit(5)개로 임시로 넣어 둔 것입니다. 배열류 디비 조회는 항상 limit를 걸어 제한하는 것이 좋습니다. 만약 버그등으로 댓글이 10만개라면 백엔드서버 껏다 켜집니다.
댓글 api 만들기
const router = require('express').Router()
const createError = require('http-errors')
const request = require('request')
const Board = require('../../../models/boards')
const Article = require('../../../models/articles')
const Comment = require('../../../models/comments')
const cfg = require('../../../../config')

router.post('/:_article', (req, res, next) => {
  const _article = req.params._article
  if (!_article) throw createError(400, '게시물이 선택되지 않았습니다')
  const { content, response } = req.body

  if (!content) throw createError(400, '내용이 없습니다')
  if (!response) throw createError(400, '로봇 검증이 없습니다')

  const ro = {
    uri: 'https://www.google.com/recaptcha/api/siteverify',
    json: true,
    form: {
      secret: cfg.recaptchaSecretKey,
      response,
      remoteip: req.ip
    }
  }
  request.post(ro, (err, response, body) => {
    if (err) throw createError(401, '로봇 검증 실패입니다')

    Article.findById(_article)
      .then(r => {
        if (!r) throw createError(400, '잘못된 게시물입니다')
        // if (r.lv < req.user.lv) throw createError(403, '권한이 없습니다')
        const cmt = {
          content,
          _article,
          ip: '1.1.1.1',//req.ip,
          _user: null
        }
        if (req.user._id) cmt._user = req.user._id
        return Comment.create(cmt)
      })
      .then(r => {
        if (!r) throw new Error('게시물이 생성되지 않았습니다')
        res.send({ success: true, d: r, token: req.token })
      })
      .catch(e => {
        res.send({ success: false, msg: e.message })
      })
  })
})


router.put('/:_id', (req, res, next) => {
  if (!req.user._id) throw createError(403, '댓글 수정 권한이 없습니다')
  const _id = req.params._id

  const { content } = req.body

  if (!content) throw createError(400, '내용이 없습니다')

  Comment.findById(_id)
    .then(r => {
      if (!r) throw new Error('댓글 존재하지 않습니다')
      if (!r._user) throw new Error('손님 댓글 수정이 안됩니다')
      if (r._user.toString() !== req.user._id) throw new Error('본인이 작성한 댓글이 아닙니다')
      return Comment.findByIdAndUpdate(_id, { $set: { content } }, { new: true }).populate('_user')
    })
    .then(r => {
      res.send({ success: true, d: r, token: req.token })
    })
    .catch(e => {
      res.send({ success: false, msg: e.message })
    })
})

router.delete('/:_id', (req, res, next) => {
  if (!req.user._id) throw createError(403, '댓글 삭제 권한이 없습니다')
  const _id = req.params._id

  Comment.findById(_id).populate('_user', 'lv')
    .then(r => {
      if (!r) throw new Error('댓글이 존재하지 않습니다')
      if (!r._user) {
        if (req.user.lv > 0) throw new Error('손님 댓글은 삭제가 안됩니다')
      }
      else {
        if (r._user._id.toString() !== req.user._id) {
          if (r._user.lv < req.user.lv) throw new Error('본인이 작성한 댓글이 아닙니다')
        }
      }
      return Comment.deleteOne({ _id })
    })
    .then(r => {
      res.send({ success: true, d: r, token: req.token })
    })
    .catch(e => {
      res.send({ success: false, msg: e.message })
    })
})

module.exports = router;
- CRUD 중 R는 게시물 읽기에서 가능하기 때문에 CUD만 하면 됩니다.
- 댓글 등록에서 제일 중요한 부분은 부모인 게시물 _id를 얻어서 같이 저장하는 것입니다. 그 이외에는 기존 게시물 CRUD와 크게 다를 것이 없습니다.
프론트엔드
프론트엔드는 기존 게시판 처리와 다를 것이 없습니다.
기존 게시판 소스에 댓글 처리를 위한 내용만 추가했습니다.
아래 코드는 결코 정답이 아니라 구현에만 목적을 두고 빠르게 작성해 본 것이니 참고용으로 보시고 직접 만들어 보기시기를 추천합니다.
fe/src/views/board/index.vue
<template>
<!-- -->
<v-dialog v-model="dialog" :max-width="500" :fullscreen="$vuetify.breakpoint.xs">
<v-card v-if="!dlMode" light>
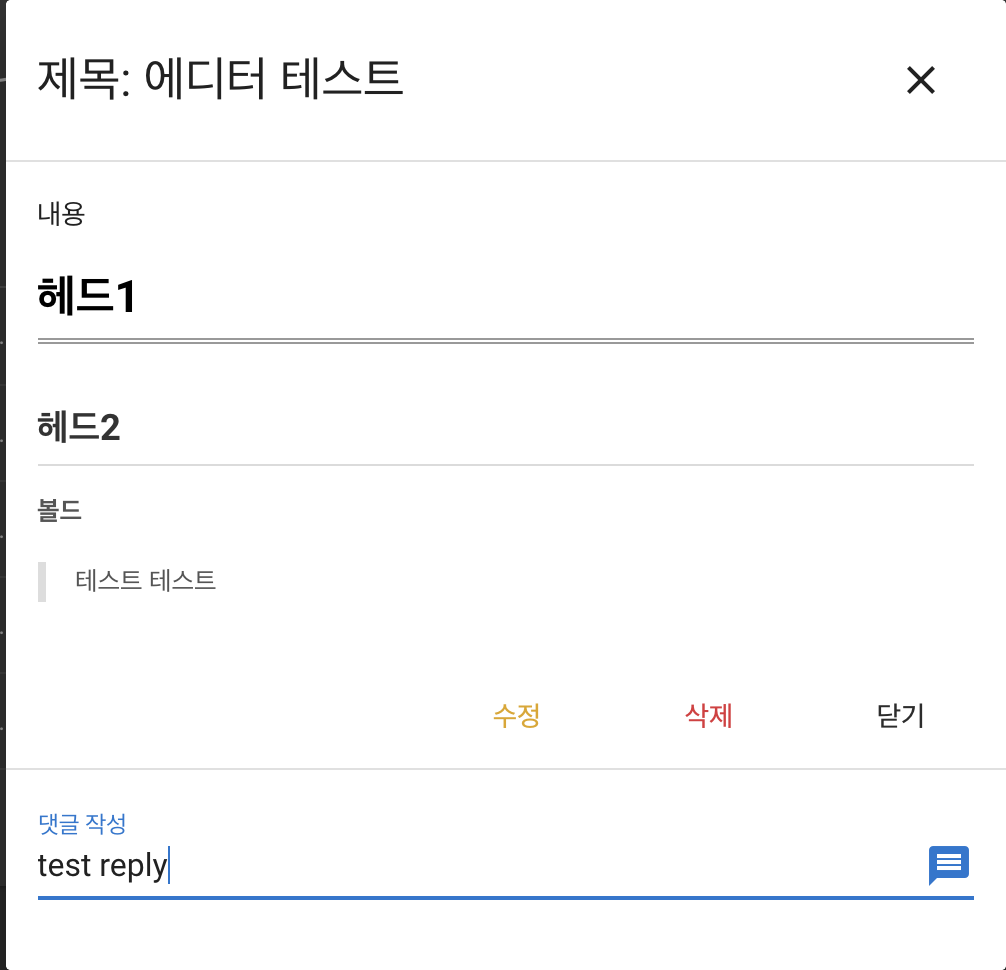
<v-card-title>
<span class="headline">제목: {{selArticle.title}}</span>
<v-spacer></v-spacer>
<v-btn
icon
@click="dialog=!dialog"
>
<v-icon>clear</v-icon>
</v-btn>
</v-card-title>
<v-divider></v-divider>
<v-card-text>
<p>내용</p>
<!-- {{selArticle.content}} -->
<viewer :value="selArticle.content" />
</v-card-text>
<v-card-actions>
<v-spacer></v-spacer>
<v-btn color="warning darken-1" flat @click.native="modDialog()">수정</v-btn>
<v-btn color="error darken-1" flat @click.native="ca=true">삭제</v-btn>
<v-btn color="secondary darken-1" flat @click.native="dialog = false">닫기</v-btn>
</v-card-actions>
<v-card-text v-if="ca">
<v-alert v-model="ca" type="warning">
<h4>정말 진행 하시겠습니까?</h4>
<v-btn color="error" @click="del()">확인</v-btn>
<v-btn color="secondary" @click="ca=false">취소</v-btn>
</v-alert>
</v-card-text>
<v-divider></v-divider>
<v-list two-line v-for="comment in selArticle._comments" :key="comment._id">
<v-list-tile>
<v-list-tile-content>
<v-list-tile-title>{{comment.content}}</v-list-tile-title>
<v-list-tile-sub-title>{{comment._user ? comment._user.id : '손님'}}</v-list-tile-sub-title>
</v-list-tile-content>
<v-list-tile-action>
<v-btn
icon
ripple
@click="commentDialogOpen(comment)"
>
<v-icon color="warning lighten-1">
create
</v-icon>
</v-btn>
</v-list-tile-action>
<v-list-tile-action>
<v-btn
icon
ripple
@click="delComment(comment)"
>
<v-icon color="error">
clear
</v-icon>
</v-btn>
</v-list-tile-action>
</v-list-tile>
<v-divider></v-divider>
</v-list>
<v-card-text>
<v-text-field
label="댓글 작성"
v-model="formComment.content"
append-icon="message"
@keyup.enter="checkRobot"
@click:append="checkRobot"
>
</v-text-field>
</v-card-text>
</v-card>
<v-card light v-else>
<v-card-title>
<span class="headline">글 {{(dlMode === 1) ? '작성' : '수정'}}</span>
<v-spacer></v-spacer>
<v-btn
icon
@click="dialog=!dialog"
>
<v-icon>clear</v-icon>
</v-btn>
</v-card-title>
<v-divider></v-divider>
<v-card-text>
<v-form>
<v-text-field
label="제목"
persistent-hint
required
v-model="form.title"
></v-text-field>
<!-- <v-textarea
label="내용"
persistent-hint
required
v-model="form.content"
></v-textarea> -->
<editor v-model="form.content"/>
</v-form>
</v-card-text>
<v-card-actions>
<v-spacer></v-spacer>
<v-btn color="green darken-1" flat @click="checkRobot()">확인</v-btn>
<v-btn color="red darken-1" flat @click.native="dialog = false">취소</v-btn>
</v-card-actions>
</v-card>
</v-dialog>
<v-dialog width="400" v-model="commentDialog">
<v-card>
<v-card-text>
<v-text-field
label="댓글 수정"
v-model="selComment.content"
@keyup.enter="modComment()"
>
</v-text-field>
</v-card-text>
<v-card-actions>
<v-btn color="warning" @click="modComment()">
수정
</v-btn>
<v-btn color="secondary" @click="commentDialog = false">닫기</v-btn>
</v-card-actions>
</v-card>
</v-dialog>
<vue-recaptcha
ref="recaptcha"
:sitekey="$cfg.recaptchaSiteKey"
size="invisible"
@verify="onVerify"
@expired="onExpired"
>
</vue-recaptcha>
<!-- -->
</template>
<script>
export default {
data () {
return {
// ..
dialog: false,
commentDialog: false,
lvs: [0, 1, 2, 3],
form: {
title: '',
content: '',
response: ''
},
response: '',
dlMode: 0, // 0: read, 1: write, 2: modify
selArticle: {
_comments: []
},
selComment: {
content: ''
},
ca: false,
timeout: null,
formComment: {
content: '',
response: ''
}
}
},
// ..
methods: {
commentDialogOpen (c) {
this.commentDialog = true
this.selComment = c
},
onVerify (r) {
this.response = r
this.$refs.recaptcha.reset()
if (this.dlMode === 0) this.addComment()
else if (this.dlMode === 1) this.add()
else if (this.dlMode === 2) this.mod()
},
onExpired () {
this.form.response = ''
this.$refs.recaptcha.reset()
},
checkRobot () {
if (!this.response.length) return this.$refs.recaptcha.execute()
if (this.dlMode === 0) this.addComment()
else if (this.dlMode === 1) this.add()
else if (this.dlMode === 2) this.mod()
},
// ..
read (atc) {
this.selArticle = atc
this.loading = true
this.$axios.get(`article/read/${atc._id}`)
.then(({ data }) => {
if (!data.success) throw new Error(data.msg)
this.dlMode = 0
this.dialog = true
this.selArticle.content = data.d.content
this.selArticle.cnt.view = data.d.cnt.view
// data.d._comments.forEach(v => { v.mod = false })
this.selArticle._comments = data.d._comments
this.loading = false
})
.catch((e) => {
if (!e.response) this.$store.commit('pop', { msg: e.message, color: 'warning' })
this.loading = false
})
},
addComment () {
this.formComment.response = this.response
this.$axios.post(`comment/${this.selArticle._id}`, this.formComment)
.then(({ data }) => {
if (!data.success) throw new Error(data.msg)
this.formComment.content = ''
this.read(this.selArticle)
// this.list()
})
.catch((e) => {
if (!e.response) this.$store.commit('pop', { msg: e.message, color: 'warning' })
})
},
delComment (cmt) {
this.$axios.delete(`comment/${cmt._id}`)
.then(({ data }) => {
if (!data.success) throw new Error(data.msg)
this.read(this.selArticle)
})
.catch((e) => {
if (!e.response) this.$store.commit('pop', { msg: e.message, color: 'warning' })
})
},
modComment () {
if (!this.selComment.content) return this.$store.commit('pop', { msg: '내용을 작성해주세요', color: 'warning' })
this.commentDialog = false
this.$axios.put(`comment/${this.selComment._id}`, { content: this.selComment.content })
.then(({ data }) => {
if (!data.success) throw new Error(data.msg)
this.read(this.selArticle)
})
.catch((e) => {
if (!e.response) this.$store.commit('pop', { msg: e.message, color: 'warning' })
})
}
}
}
</script>
변경된 부분만 표현했습니다. 전체 소스는 아래 깃헙 링크에서 확인하시기 바랍니다.
댓글 쓰기
역시 댓글도 봇이 활동할 수 있으므로 리캡챠(recaptcha)를 재활용 했습니다.
간단한 텍스트필드를 이용해서 키보드 엔터와 전송 아이콘에 훅(checkRobot에 연결)을 걸어두었습니다.
댓글은 항상 글 읽기 모드(dlMode === 0 일 때)에서 동작하므로 checkRobot()에서 addComment() 로 연결 시켰습니다.
리캡챠 토큰을 관리를 위해 기존 form 변수의 response 데이터를 따로 두었습니다.(영 아닌 코딩이지만 일단 돌아가게..)
댓글 읽기
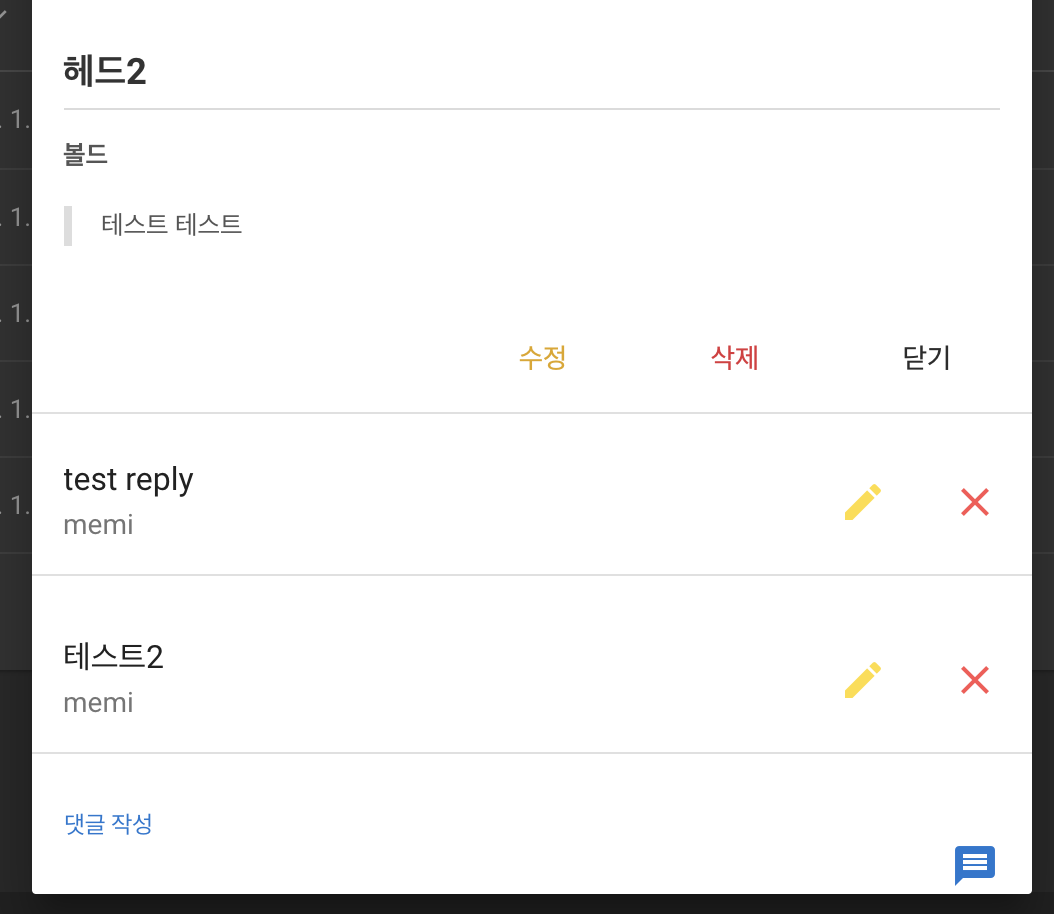
v-list를 활용하여 댓글들을 나열했습니다.
댓글에 취할 액션인 수정과 삭제 버튼을 나란히 배치하고 각각 이벤트를 걸어둡니다.
댓글 수정

다이얼로그를 띄워서 수정해야 되기 때문에 전달할 변수(selComment)가 필요합니다.
현재 선택된 댓글 정보를 넘겨서 수정 후 modComment에서 처리 합니다.
댓글 삭제
버튼 클릭 즉시 해당 댓글의 아이디를 전송합니다.
귀찮아서 확인 창을 만들지 않았습니다..
마치며
만들고 나니.. 게시물을 읽고 댓글을 따로 읽는 것이 좋다는 생각이 듭니다.
그래서 오히려 말씀드리고 싶은 부분은.. 선구현으로 빠르게 돌아가는 것 확인했으니 이제 깔끔한 UI와 정리된 API로 후개선을 하면 것입니다.
개발자라면 현재 상황이 적은 양의 데이터 기반 프로젝트라도 많은 양이 올 때를 미리 대비해두면 유지보수 측면에서 좋습니다.
그렇다고 너무 장황하게 많은 것을 고려하여 설계하면 시작이 안되니 처음에는 1차원적으로 디버깅이 용이하게 구현하고, 추후 맘에드는 코드로 변경하는 것이 좋다고 생각합니다.
댓글남기기