새로운 강의는 이제 https://memi.dev 에서 진행합니다.
memi가 Vue & Firebase로 직접 만든 새로운 사이트를 소개합니다.
Flutter와 Firebase로 Android iOS 둘 다 만들기 23 사진 가져오고 압축하기
플러터 image_picker 모듈을 사용해서 카메라의 사진 혹은 내장 앨범의 사진을 가져오고 압축해서 표시해봅니다.
개요
image_picker를 사용하면 iOS android 모두 쉽게 사진을 가져올 수 있습니다.
참고: https://pub.dev/packages/image_picker
가져오는 것은 쉽지만, 최근 핸드폰들이 성능이 좋아져서 대부분 3,4메가는 쉽게 넘깁니다.
결국 서버(fireStorage)에 3,4메가나 올리는 것은 서버 비용도 부담이고 매번 로드할때 너무 느리기 때문에 이미지를 압축해서 표시합니다.
사진 가져오기
설치
dependencies:
  flutter:
    sdk: flutter
  # ..
  image_picker: ^0.6.3+4
ios 권한 부여
android의 경우 권한이 따로 필요 없지만 iOS의 경우 카메라 및 앨범 접근시 확인 창을 눌러서 진행하게 됩니다.
- NSCameraUsageDescription: 카메라 권한
- NSPhotoLibraryUsageDescription: 앨범 권한
ios/Runner/info.plist
  <key>LSRequiresIPhoneOS</key>
  <true/>
  <key>NSCameraUsageDescription</key>
  <string>You can change your profile picture</string>
  <key>NSPhotoLibraryUsageDescription</key>
  <string>You can change your profile picture</string>
  <key>UIBackgroundModes</key>
  <array>
xcode를 열어서 해도 되고 info.plist파일에 직접 넣어도 됩니다.
어디쯤인지 감이 안오시는 분들을 위해 코드 위아래 일부를 발췌합니다.
준비
import 'package:image_picker/image_picker.dart';
import 'dart:io';
이미지는 결국 파일 입니다. 파일을 사용하기 위해 dart:io가 필요합니다.
함수 만들기
pages/profile_edit.dart
class _ProfileEditPageState extends State<ProfileEditPage> {
  File _image;

  Future getImage(ImageSource source) async {
    File image = await ImagePicker.pickImage(source: source);
    if (image == null) return;
    setState(() => _image = image);
  }
  // ..
}
ImageSource만 변경해서 카메라와 앨범에서 이미지, 결국 파일을 가져올 수 있습니다.
이미지를 선택하지 않았을 때 null이기 때문에 아래로 내려가지 못하게 막아줍니다.
버튼 꾸미기
Widget _buildCameraButton() {
  return IconButton(
    alignment: Alignment.bottomRight,
    padding: EdgeInsets.all(0),
    color: Colors.white,
    icon: Icon(Icons.photo_camera),
    onPressed: () async {
      await getImage(ImageSource.camera);
    },
  );
}

Widget _buildPhotoAlbumButton() {
  return IconButton(
    alignment: Alignment.bottomRight,
    padding: EdgeInsets.all(0),
    color: Colors.white,
    icon: Icon(Icons.photo_library),
    onPressed: () async {
      await getImage(ImageSource.gallery);
    },
  );
}
디버그 툴로 보면 IconButton이 엄청 크다는 걸 알수 있습니다.
그래서 alignment, padding으로 구석으로 몰아 넣었지만.. 보기 좋지 못합니다.
Widget _buildCameraButton() {
  return InkWell(
    child: Icon(Icons.photo_camera, color: Colors.white,),
    onTap: () async {
      await getImage(ImageSource.camera);
    },
  );
}

Widget _buildPhotoAlbumButton() {
  return InkWell(
    child: Icon(Icons.photo_library, color: Colors.white,),
    onTap: () async {
      await getImage(ImageSource.gallery);
    },
  );
}
그래서 결국 이미지를 InkWell로 덮었습니다.
이미지소스만 다르게 하여 getImage를 호출합니다.
화면에 표시하기
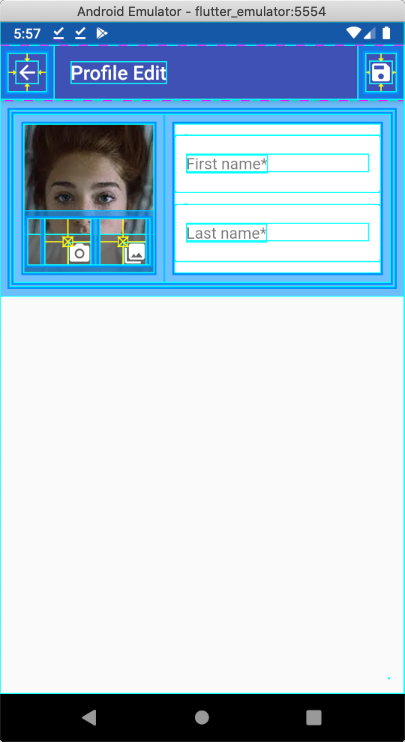
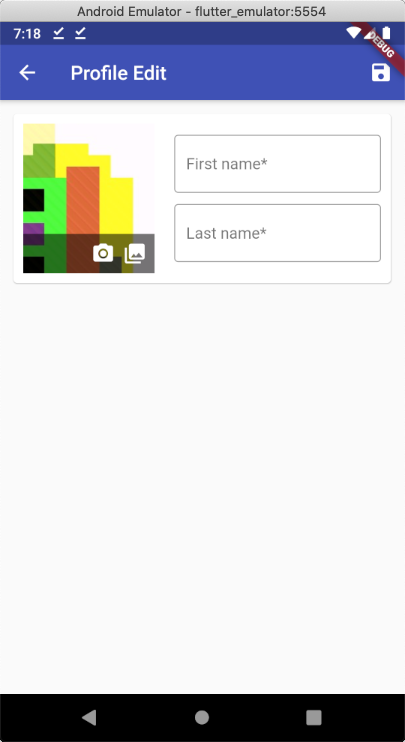
Widget _buildPhoto() {
  return Container(
    padding: EdgeInsets.all(10),
    child: Stack(
      alignment: Alignment.bottomCenter,
      children: <Widget>[
        Container(
          constraints: BoxConstraints.expand(),
          child: _image == null ? Image.network(widget.user.photoUrl, fit: BoxFit.cover) : Image.file(_image, fit: BoxFit.cover),
        ),
        Container(
          color: Colors.black54,
          height: 40,
        ),
        ButtonBar(
          alignment: MainAxisAlignment.end,
          children: <Widget>[
            _buildCameraButton(),
            _buildPhotoAlbumButton(),
          ],
        )
      ],
    ),
  );
}
이미지 파일이 없을 때는 계정의 파일을 보여주고 있을 때는 이미지 파일을 표시합니다.
사진 압축하기
flutter_image_compress를 이용해서 압축합니다.
참고: https://pub.dev/packages/flutter_image_compress
압축은 간단하지만 염두해야할 것이 있습니다.
대부분 선택한 파일을 교체하는 것을 원하지는 않을 것입니다.
압축한 후에 특정 장소에 저장해야 하는 것입니다.
그리고 사용하고 나서 쓸모 없는 파일이기 때문에 삭제도 해줘야합니다.
설치
flutter_image_compress: ^0.6.5+1
path_provider: ^1.6.5
준비
import 'package:path_provider/path_provider.dart';
import 'package:path/path.dart' as path;
import 'package:flutter_image_compress/flutter_image_compress.dart';
저장할 위치 선정을 위해 path_provider가 필요합니다.
그리고 저장한 위치의 경로를 조합하기 위해 path 유틸리티가 필요합니다.
node.js 의 path와 거의 동일
임시경로 얻기
File image = await ImagePicker.pickImage(source: source);
Directory tempDir = await getTemporaryDirectory();
String tempPath = path.join(tempDir.path, path.basename(image.path));
print(tempPath); // /data/user/0/com.memi.ff6/cache/britney-spears-plastic-surgery.jpg
선택한 이미지 파일의 임시 경로 위치를 만들었습니다.
압축함수 만들기
Future<File> _compressFile(File file, String tempPath) async {
  final result = await FlutterImageCompress.compressAndGetFile(
    file.absolute.path,
    tempPath,
    minWidth: 200,
    minHeight: 200,
    quality: 90,
    // rotate: 90,
  );
  return result;
}
해상도를 줄이고 압축한 결과물을 얻습니다.
이미지 가져오기
Future getImage(ImageSource source) async {
  File image = await ImagePicker.pickImage(source: source);
  if (image == null) return;
  Directory tempDir = await getTemporaryDirectory();
  String tempPath = path.join(tempDir.path, path.basename(image.path));
  File tempImage = await _compressFile(image, tempPath);
  print(image.lengthSync()); // 157083
  print(tempImage.lengthSync()); // 21526
  setState(() => _image = tempImage);
}
비약적으로 이미지 사이즈가 줄었습니다.
테스트
안드로이드의 경우 시뮬레이터 카메라로 가져올 수도 있습니다.
소스
https://github.com/fkkmemi/ff2
댓글남기기