새로운 강의는 이제 https://memi.dev 에서 진행합니다.
memi가 Vue & Firebase로 직접 만든 새로운 사이트를 소개합니다.
Flutter와 Firebase로 Android iOS 둘 다 만들기 10 REST API 사용해보기
플러터로 REST API를 시험해봅니다.
개요
파이어베이스 제품군을 이용하면 대부분의 네트워크 및 데이터베이스 상호작용이 가능하지만 외부와의 소통은 REST API가 가장 보편적입니다.
REST 역활을 해줄 간단한 웹서버와 플러터의 http 모듈을 사용해서 테스트해봅니다.
참고: https://flutter-ko.dev/docs/cookbook/networking/fetch-data
웹서버 만들기
기본적으로 nodejs(v10 이상) 와 yarn(v1 이상)이 설치되어 있어야합니다.
프로젝트 생성
$ mkdir koa-rest && koa-rest
$ yarn init
의존요소 설치
웹서버 koa와 도우미 모듈들을 설치합니다.
$ yarn add koa
$ yarn add koa-router
$ yarn add koa-bodyparser
코드 작성
const Koa = require('koa')
const Router = require('koa-router')
const BodyParser = require('koa-bodyparser')

const app = new Koa()
const router = new Router()
app.use(BodyParser())

router
  .get('/', (ctx, next) => {
    ctx.body = 'get'
  })
  .post('/', (ctx, next) => {
    console.log(ctx.request.body)
    ctx.body = 'post'
  })
  .put('/', (ctx, next) => {
    console.log(ctx.request.body)
    ctx.body = 'put'
  })
  .delete('/', (ctx, next) => {
    ctx.body = 'delete'
  })

app
  .use(router.routes())
  .use(router.allowedMethods())

app.listen(3000, () => console.log('koa go~'))
간단하게 REST 시험을 해볼 수 있는 코드를 작성해봤습니다.
서버 구동
$ node .
koa go~
서버를 구동시켜 놓고 플러터를 만들러 갑니다.
플러터
REST 고유기능만 확인해보기 위해 새로운 프로젝트로 만들어봅니다.
웹기반에서의 axios 처럼 플러터에도 강력한 http모듈이 있습니다.
모듈 참고: https://pub.dev/packages/http
작업공간 만들기
lib/main.dart
import 'package:flutter/material.dart';

void main() => runApp(MyApp());

class MyApp extends StatelessWidget {
  // This widget is the root of your application.
  @override
  Widget build(BuildContext context) {
    return MaterialApp(
      title: 'Flutter Demo',
      theme: ThemeData(
        primarySwatch: Colors.blue,
      ),
      home: RestTest(),
    );
  }
}

class RestTest extends StatefulWidget {
  RestTest({Key key}) : super(key: key);

  @override
  _RestTestState createState() => _RestTestState();
}

class _RestTestState extends State<RestTest> {
  String input = '', response = '';

  @override
  Widget build(BuildContext context) {
    return Scaffold(
      appBar: AppBar(
        title: Text('Rest test'),
      ),
      body: Container(
        padding: EdgeInsets.all(20),
        child: Column(
          children: <Widget>[
            TextField(
              onChanged: (t) {
                print(t);
                input = t;
              },
            ),
            Row(
              mainAxisAlignment: MainAxisAlignment.spaceEvenly,
              children: <Widget>[
                Text('post'),
                Text('get'),
                Text('put'),
                Text('delete'),
              ]
            ),
            Card(
              child: Text(response),
            )
          ],
        )
      ),
    );
  }
}
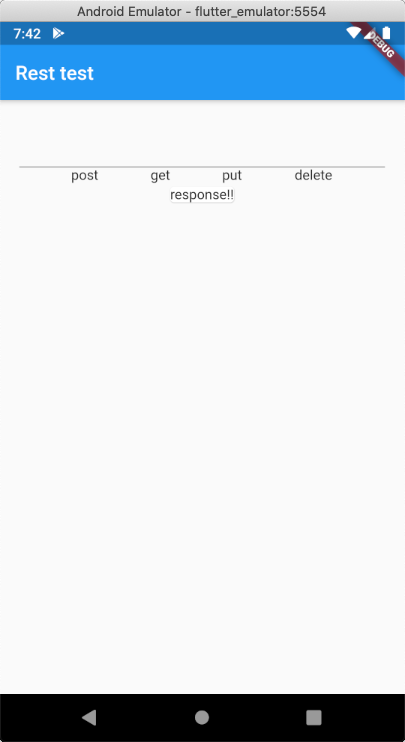
시험을 진행할 공간을 대충 만들어 둡니다.
http 모듈 설치
pubspec.yaml
dependencies:
  ##
  cupertino_icons: ^0.1.2
  http: ^0.12.0+4
http 모듈만 작성하면 vscode에서 자동으로 설치해줍니다.(flutter pub get)
import 'package:http/http.dart' as http;
상단에 임포트만 해주면 끝입니다.
포스트 해보기
  Widget _post () {
    return RaisedButton(
      child: Text('post'),
      onPressed: () async {
        const url = 'http://192.168.0.3:3000';
        final r = await http.post(url, body: { 'a': input });
        print('Response status: ${r.statusCode}');
        print('Response body: ${r.body}');
        setState(() {
          response = r.body;
        });
      },
    );
  }
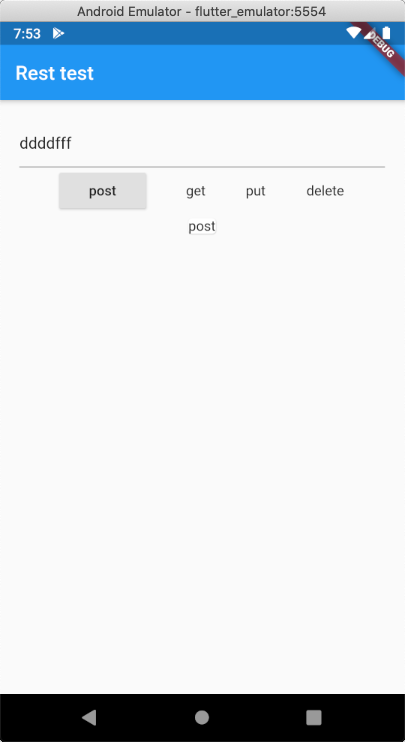
Text(‘post’) 를 post()(_위 코드)로 변경하고 테스트 해봅니다.
TextField에 적혀있는 값을 보내는 것인데 생각해봐야할 것들이 있습니다.
await http.post(url, body: input)
이렇게 보낼 경우 웹서버에서 바디파서가 json형식이 아니라서 파싱을 정상적으로 못해줍니다.
await http.post(url, body: { 'a': 333 });
333은 String 형식이 아니기 때문에 역시 못보냅니다.
await http.post(url, body: { 'a': 'b', 'c': 'd' });
마치 json 같은 바디의 내용은 사실 json이 아닌 Map<String, String> 형식입니다.
그래서 실제로 적용할 땐 json encode/decode등을 명확하게 이해하고 코드를 작성해야합니다.
json 조립은 다음 강좌에서 진행합니다.
전체 코드
import 'package:flutter/material.dart';
import 'package:http/http.dart' as http;

const url = 'http://192.168.0.3:3000';

void main() => runApp(MyApp());

class MyApp extends StatelessWidget {
  // This widget is the root of your application.
  @override
  Widget build(BuildContext context) {
    return MaterialApp(
      title: 'Flutter Demo',
      theme: ThemeData(
        primarySwatch: Colors.blue,
      ),
      home: RestTest(),
    );
  }
}

class RestTest extends StatefulWidget {
  RestTest({Key key}) : super(key: key);

  @override
  _RestTestState createState() => _RestTestState();
}

class _RestTestState extends State<RestTest> {
  String input = '', response = 'response!!';

  @override
  Widget build(BuildContext context) {

    return Scaffold(
      appBar: AppBar(
        title: Text('Rest test'),
      ),
      body: Container(
        padding: EdgeInsets.all(20),
        child: Column(
          children: <Widget>[
            TextField(
              onChanged: (t) {
                print(t);
                input = t;
              },
            ),
            Row(
              mainAxisAlignment: MainAxisAlignment.spaceEvenly,
              children: <Widget>[
                _post(),
                _get(),
                _put(),
                _delete(),
              ]
            ),
            Card(
              child: Text(response),
            )
          ],
        )
      ),
    );
  }
  Widget _post () {
    return RaisedButton(
      child: Text('post'),
      onPressed: () async {
        final r = await http.post(url, body: { 'a': input });
        print('Response status: ${r.statusCode}');
        print('Response body: ${r.body}');
        setState(() {
          response = r.body;
        });
      },
    );
  }
  Widget _get () {
    return RaisedButton(
      child: Text('get'),
      onPressed: () async {
        final r = await http.get(url);
        print('Response status: ${r.statusCode}');
        print('Response body: ${r.body}');
        setState(() {
          response = r.body;
        });
      },
    );
  }
  Widget _put () {
    return RaisedButton(
      child: Text('put'),
      onPressed: () async {
        final r = await http.put(url, body: { 'a': input });
        print('Response status: ${r.statusCode}');
        print('Response body: ${r.body}');
        setState(() {
          response = r.body;
        });
      },
    );
  }
  Widget _delete () {
    return RaisedButton(
      child: Text('delete'),
      onPressed: () async {
        final r = await http.delete(url);
        print('Response status: ${r.statusCode}');
        print('Response body: ${r.body}');
        setState(() {
          response = r.body;
        });
      },
    );
  }
}
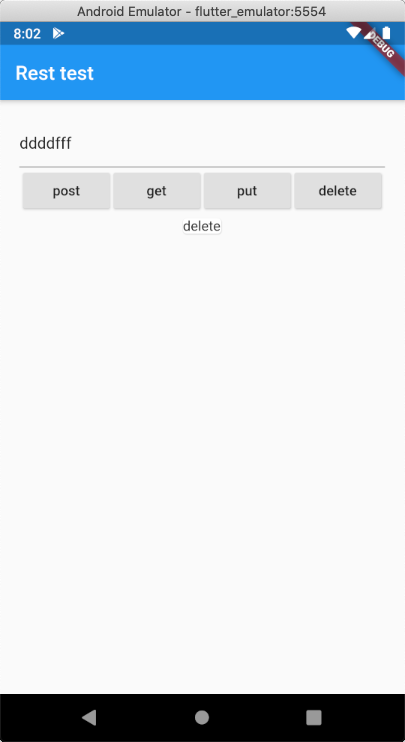
별 내용도 없는데 코드만 깁니다..
댓글남기기