새로운 강의는 이제 https://memi.dev 에서 진행합니다.
memi가 Vue & Firebase로 직접 만든 새로운 사이트를 소개합니다.
모던웹(NEMV) 혼자 제작 하기 3기 - 70 게시판 내용 읽기
게시판 목록과 내용을 분리해서 읽어보겠습니다.
개요
현재까지는 게시물 전체를 가져와서 표시했습니다.
게시물 내용이 적을 때나 그렇게 쓰는 것이지 내용이 많으면 엄청난 부하가 걸리죠.
작전
읽는 부분을 2가지로 나눕니다.
| 요청 유형 | 파라메터(params) | 내용(body or query) | 설명 |
|---|---|---|---|
| Create, POST | _board | 게시물 내용 | 어떤 게시판에 내용을 씀 |
| Read, GET | list/_board | 없음 | 어떤 게시판의 게시물 목록을 가져옴 new! |
| Read, GET | read/_id | 없음 | 어떤 게시판의 게시물 내용을 가져옴 new! |
| Update, PUT | _id | 수정된 게시물 내용 | 어떤 게시물의 내용을 변경 |
| Delete, DELETE | _id | 없음 | 어떤 게시물의 내용을 삭제 |
list, read로 읽는 부분을 2가지로 나누었습니다.
백엔드
몽구스의 select 로 원하는 값을 골라서 받을 수 있습니다.
게시물 목록 읽기 API
be/routes/api/article/index.js
router.get('/list/:_board', (req, res, next) => {
  const _board = req.params._board

  const f = {}
  if (_board) f._board = _board

  Article.find(f).select('-content').populate('_user', '-pwd')
    .then(rs => {
      res.send({ success: true, ds: rs, token: req.token })
    })
    .catch(e => {
      res.send({ success: false, msg: e.message })
    })
})
.select(‘-content’) 으로 내용을 제거한 결과를 보냅니다.
게시물 내용 읽기 API
be/routes/api/article/index.js
router.get('/read/:_id', (req, res, next) => {
  const _id = req.params._id

  Article.findById(_id).select('content')
    .then(r => {
      res.send({ success: true, d: r, token: req.token })
    })
    .catch(e => {
      res.send({ success: false, msg: e.message })
    })
})
.select(‘content’) 로 게시물 하나의 내용만 읽어서 전송합니다.
findById() findOne() 의 차이는 findById(id) = findOne({ _id: id }) 입니다 그냥 편의를 위해 몽구스에서 만든 것이죠.
프론트 목록과 내용 읽기
<template>
  <template slot="items" slot-scope="props">
    <td :class="headers[1].class"><a @click="read(props.item)"> {{ props.item.title }}</a></td>
    <td :class="headers[2].class">{{ props.item._user ? props.item._user.id : '손님' }}</td>
  </template>

    <v-dialog v-model="dlRead" persistent max-width="500px">
      <v-card>
        <v-card-title>
          <span class="headline">{{rd.title}}</span>
        </v-card-title>
        <v-card-text>
          {{rd.content}}
        </v-card-text>
        <v-card-actions>
          <v-spacer></v-spacer>
          <v-btn color="red darken-1" flat @click.native="dlRead = false">닫기</v-btn>
        </v-card-actions>
      </v-card>
    </v-dialog>
</template>
<script>
export default {
  data () {
    return {
      // ..
      dlRead: false,
      rd: {
        title: '',
        content: ''
      }
    }
  },
  // ..
  methods: {
    // ..
    list () {
      if (this.loading) return
      this.loading = true
      this.$axios.get(`article/list/${this.board._id}`)
        .then(({ data }) => {
          this.articles = data.ds
          this.loading = false
        })
        .catch((e) => {
          this.pop(e.message, 'error')
          this.loading = false
        })
    },
    read (atc) {
      this.rd.title = atc.title
      this.loading = true
      this.$axios.get(`article/read/${atc._id}`)
        .then(({ data }) => {
          this.dlRead = true
          this.rd.content = data.d.content
          this.loading = false
        })
        .catch((e) => {
          this.pop(e.message, 'error')
          this.loading = false
        })
    },
    // ..
  }
}
</script>
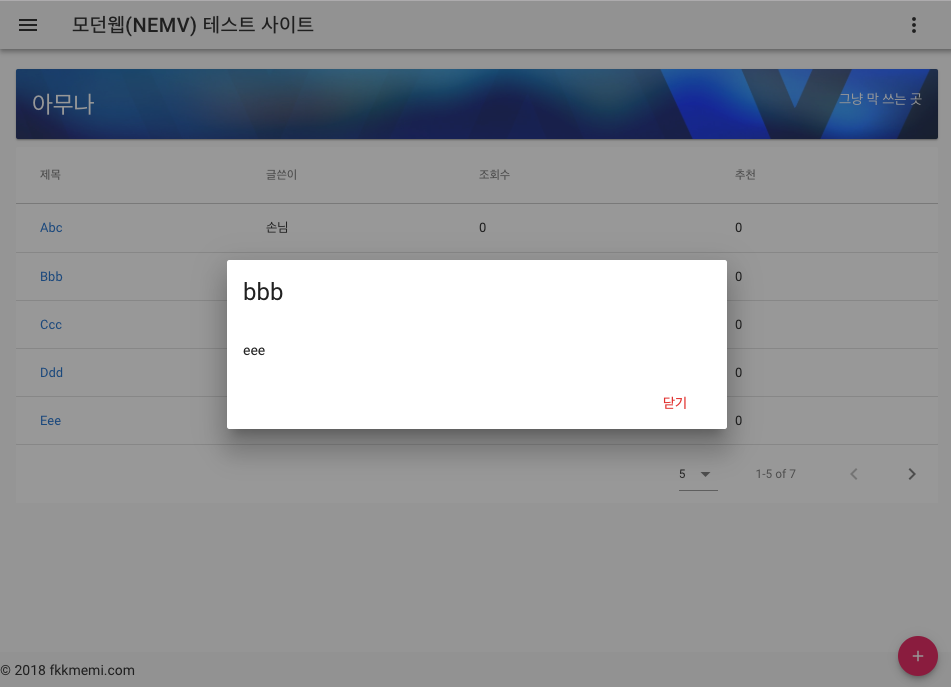
글 제목에 링크를 걸어서 다이얼로그를 띄우게 했습니다.
- 게시물을 그대로 read(atc)넘깁니다.
- this.rd라는 변수에 제목(atc.title)을 넣어줍니다.
- api호출해서 내용(content)를 받아서 this.rd.content에 넣어줍니다.
- 새로 만든 다이얼로그(dlRead)를 띄웁니다.
결과


댓글남기기